
Making ammo for the 1896 Bergmann No. 3
Posted by Chefur on Sep 9th 2026
My friend and employer, Brandon, has a habit of finding weird, old guns and tasking my coworkers and I with restoring them to firing condition. The latest of our adventures was an 1896 Bergmann No. 3, a now-obscure model of one of the earliest semi automatic handguns.
There’s quite a big incentive to shoot one of these on YouTube, at least for us: there’s no footage of one of these guns being fired anywhere on the internet. I’m sure someone has a forgotten VHS tape in their basement, but that’s not much use to anyone looking to learn about these cool old pistols today.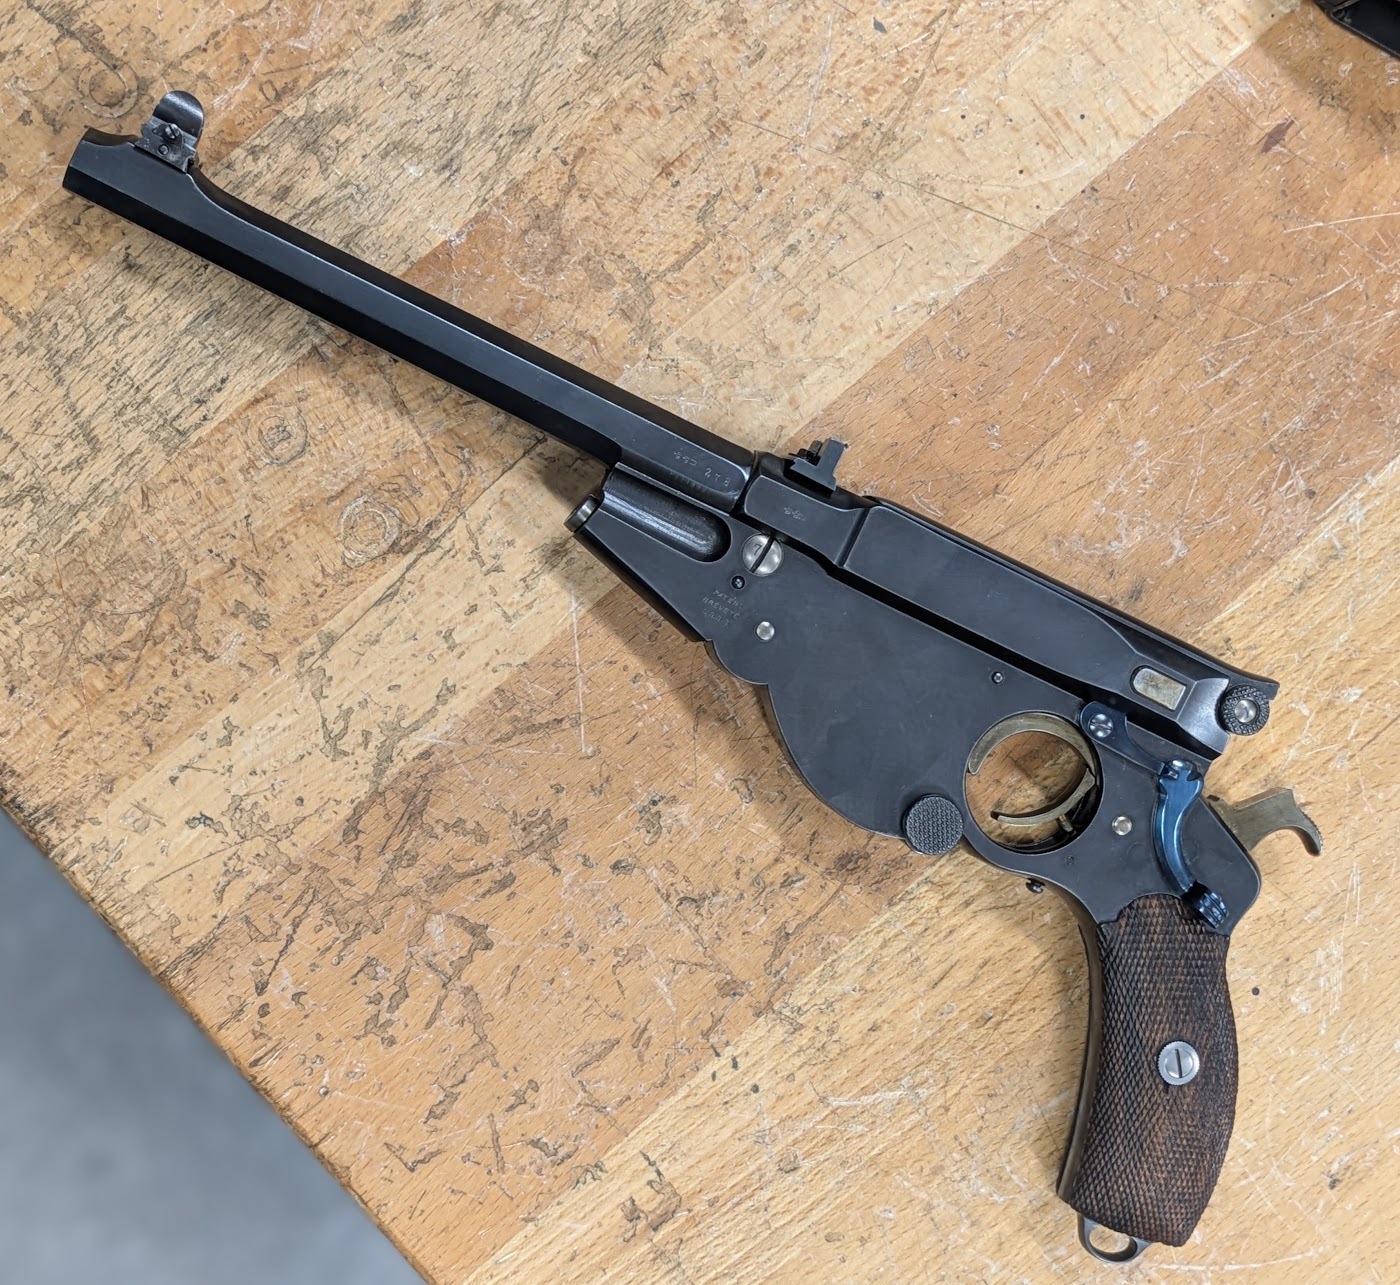
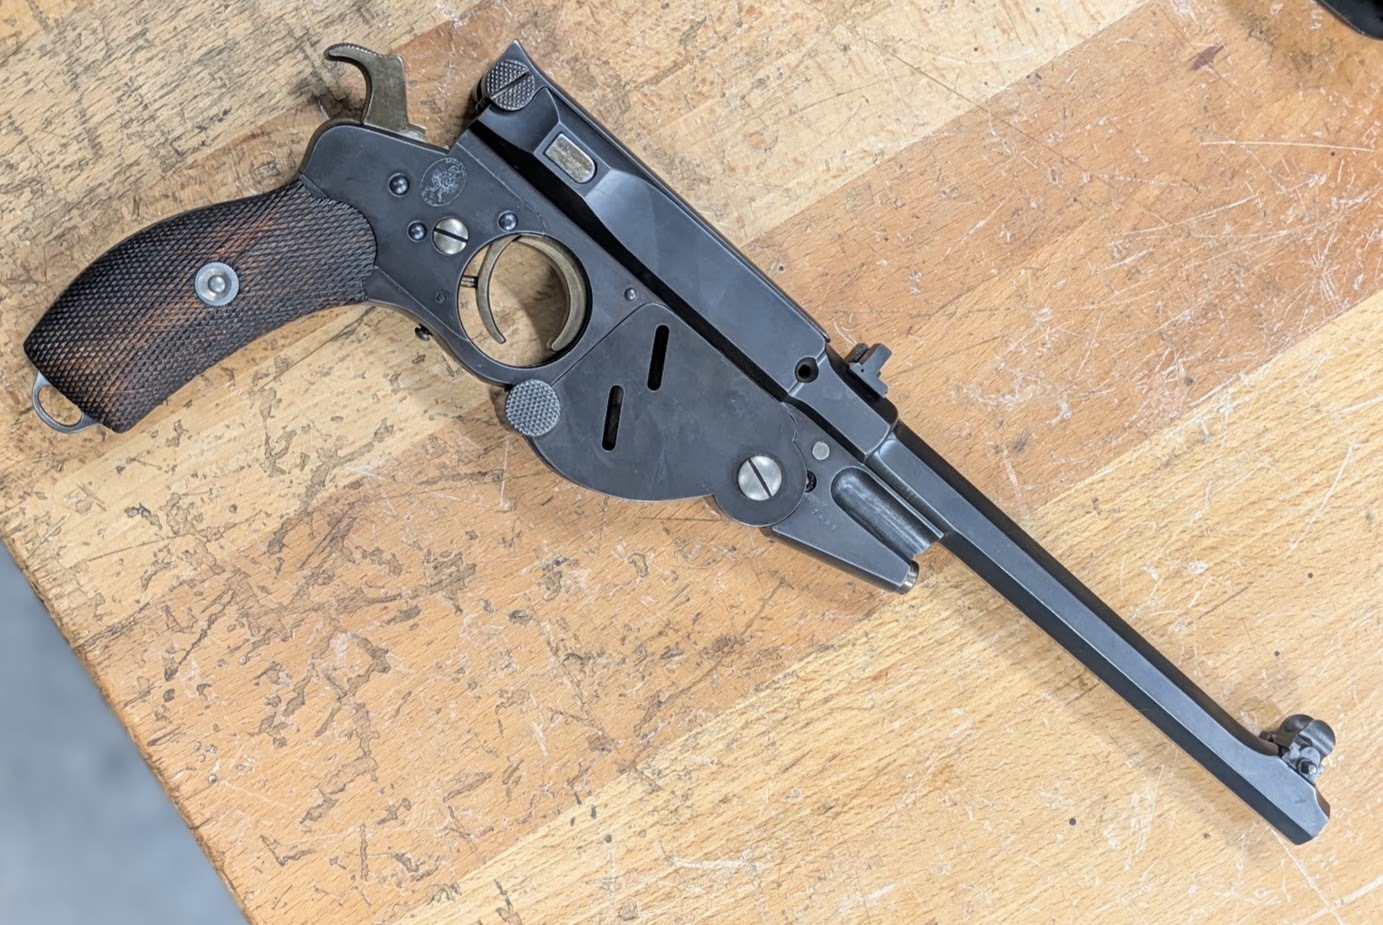
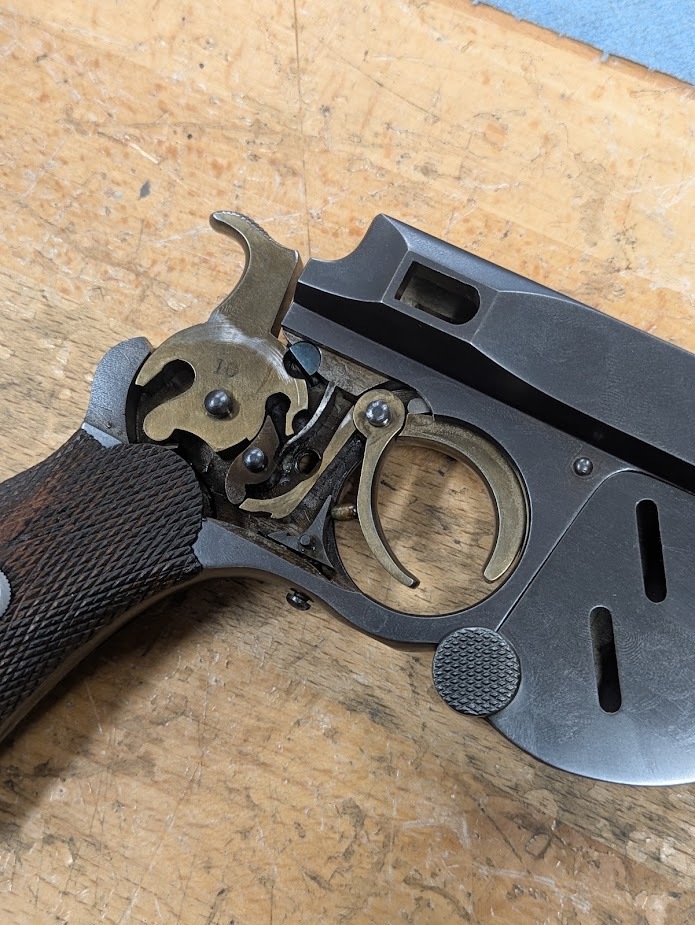
This gun was originally chambered in 6.5mm Bergmann, a mildly humorous looking early entry in the chain of small arms ammunition that lead us to today's calibers. This one fires an 80 grain bullet at 750 feet per second, adding up to exactly 100 ft-lbs of energy, right in the ballpark of a typical .22LR cartridge.
Of course, finding ammo for an obscure 130 year old handgun is not easy. After a month or two of looking around, we only managed to get a single round. Furthermore, this round is also incredibly old and likely to be degraded and unsafe. Hardly sufficient for making a video!
So, we were tasked with making new ammo for this old contraption.
If you want to see this project in video form instead, consider subscribing to our channel on Pepperbox.tv. We can't show any of this on YouTube, but Pepperbox hosts us and makes enough money to pay the camera guy and editor a fair wage.
We removed the barrel from the gun, chambered the old cartridge, and immediately found several problems. The case wiggled side to side quite a bit, fitting far more loosely than expected from a typical cartridge. It also sat far deeper into the barrel than the bolt face depth would allow, preventing the case head from reaching the bolt face. This wasn’t going to work, this cartridge was clearly a different pattern than our barrel.
Since the cartridge fit so poorly, we set about reverse engineering the chamber. My first attempt at mapping the chamber was using a Cerrosafe casting, but I encountered a lot of trouble getting good readings and a clean extraction of the casting due to the scattered pitting around the chamber.
However, there was enough of the chamber intact to map using a different method. Using a series of different sized precision ball bearings, along with a depth micrometer, we were able to map the case body very precisely. Other details, such as the shoulder and bullet diameter, were achieved with a Cerrosafe casting despite the rough surface condition.
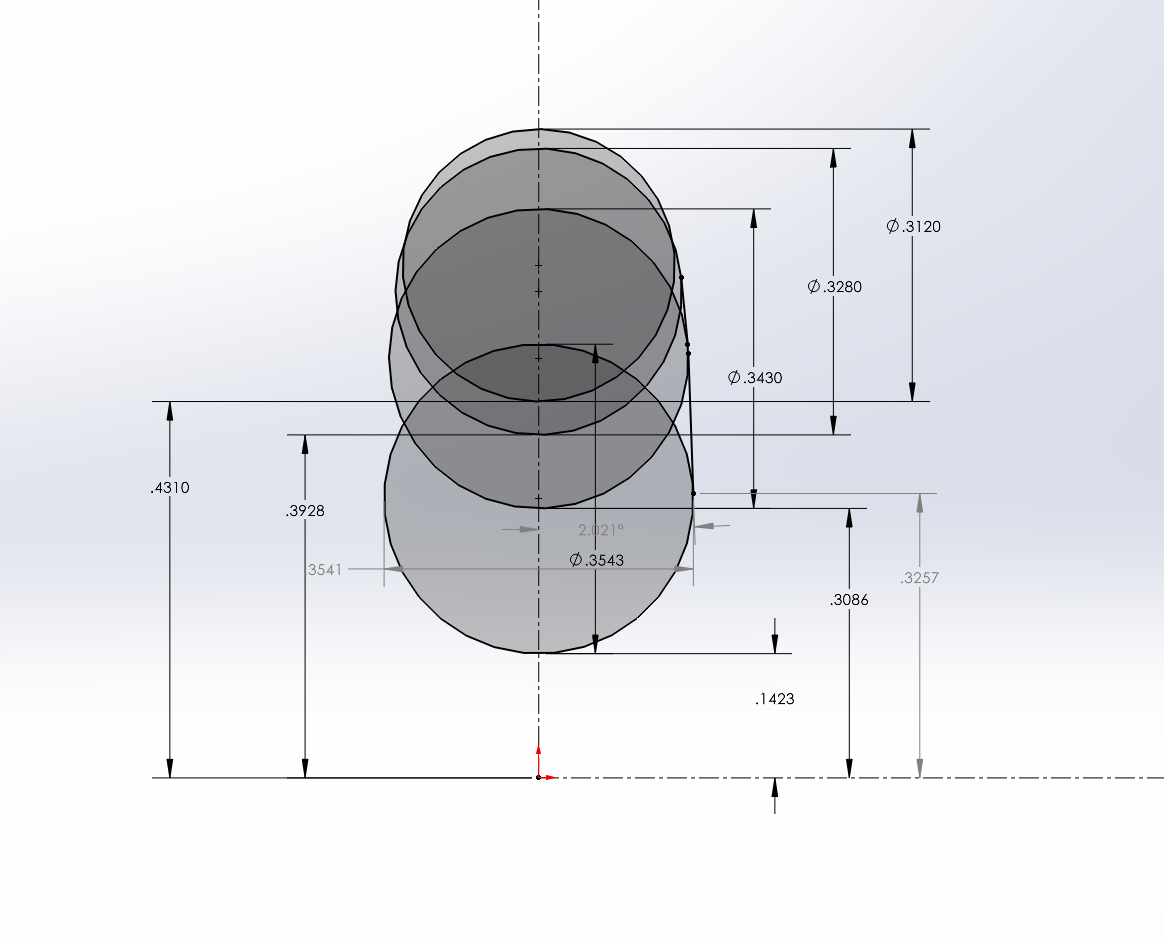
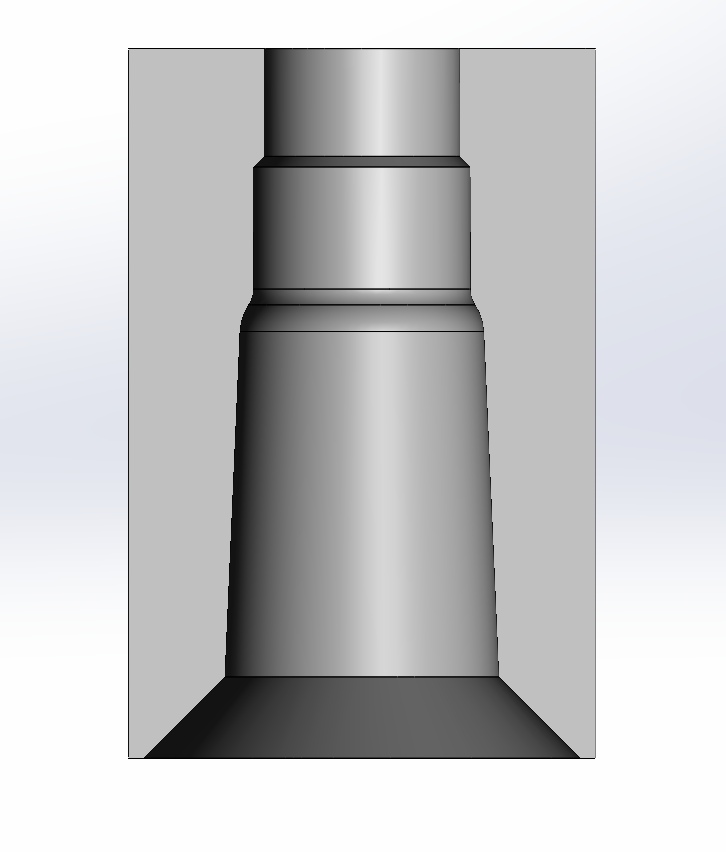
Once we had a map of the chamber, making a model of a casing was fairly straightforward. We (meaning poor Nik) looked through a ton of CIP and SAAMI chamber and cartridge drawings to figure out the typical amount of clearance given in different areas of the chamber, and we drew a casing following these established clearances.
We had to make a pretty major departure on cartridge OAL to get the gun to actually headspace. In a direct blowback gun set up like this, typically the bolt's forward movement is stopped on either the barrel face, or the cartridge, depending on if it's loaded or not. In this questionable example of a gun, the top half of the bolt (separate from the actual breech face, held on with a screw) was stopping on a random surface in the frame, distributing load through a screw that I suspect wasn't meant to be taking an impact. Because of this, I increased the headspace length of the cartridge until the bolt could rest on it, which wound up being an addition of a whopping ~0.045". Maybe the bolt really is supposed to hit on the questionable surface, but without the luxury of an original, properly fitting cartridge, I decided to set the headspace such that the forward motion of the bolt stopped on the case head, with 0.005” clearance on the questionable bolt stop surface. The additional amount of unsupported casing sticking out from the chamber was not as much of a concern as it otherwise may have been, because of how deep the feed ramp was machined into the barrel - the weak point of casing support was already further forward than the newly exposed area. Additionally, the shape of the inside of the casing being nonstandard for machining (explained more later) strengthened this area with thicker walls.
Since we don’t have a CNC lathe yet, we set up brass bar stock in my CNC mill and machined brass dummies, tweaking the headspace length and shoulder shape until everything was chambering freely, headspacing properly, and falling out of the chamber by it’s own weight.
I then made a guess at the thickness of the walls of the brass casing based on a small collection of various sectioned casings, and hollowed out the model to approximate the internal cavity of a real casing. The casing’s internal geometry had to be slightly modified from a typical mass produced cartridge in order to be machineable, and as such the shape where the walls meet the base of the casing now being a bit thicker with larger radii.
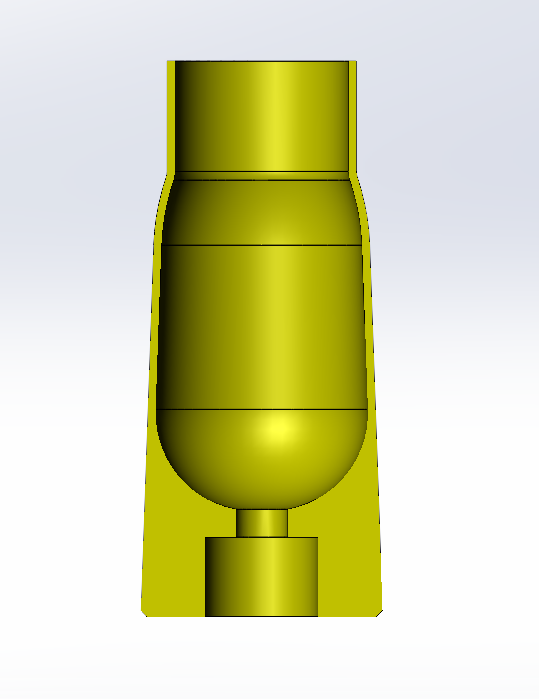
The next step of the process involved internal ballistics simulations using a program called Gordon’s Reloading tool (GRT), which is a free program with functions very similar to QuickLoad; in short, it simulates the burn of gunpowder inside a firearm.
Using the dimensions and geometries generated from the SolidWorks model, we set up a custom caliber using GRT. This tool allows for a custom caliber to be created by supplying case and chamber dimensions, internal case volume, bullet, etc to give a complete internal simulation of a given cartridge and barrel.
After plugging in the cartridge and chamber, it was time to choose a powder. The original powder is a long discontinued type, a blend somewhere in between black powder and smokeless. The biggest hurdle we faced when choosing a powder in this instance is case fill. If you have a big open cavity with only a little bit of gun powder in it, the powder can settle into a thin layer along the case wall. Then, a primer flashing over the top can ignite all of it at once, causing a detonation instead of a burn.
We dug through the library entries in GRT until we found something with a pressure curve that looked reasonable, and a low bulk density meaning the gunpowder is very airy and takes up a lot of space.
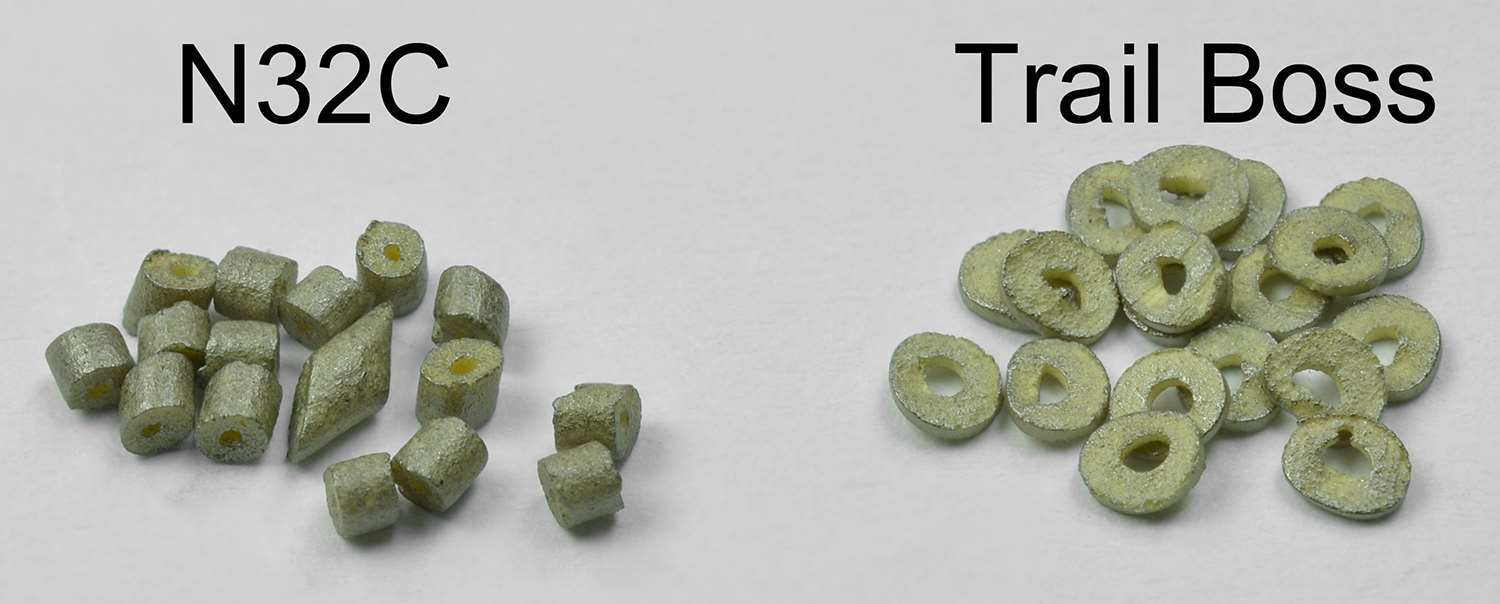
According to GRT, we needed 1.7 grains of Vihtavuori N32C powder, most commonly used for Cowboy Action type reloading. In a painfully typical and unsurprising fashion, we found the powder was discontinued. Unfortunately, also to no-one's surprise, no other powder in GRT was even remotely close to viable.
I asked around and got insanely lucky - my friend Josh happened to have an unopened canister of the N32C sitting on his reloading bench. Problem solved, thanks Josh!
Through the process of making this ammo I asked a lot of people for help, many of which recommended trying Hodgdon Trail Boss powder. While I think it would probably work, it's not available for the GRT simulations and I really didn't want to risk breaking this gun more than we already were.
Even though this Vihtavuori powder had the lowest bulk density on the list, GRT was estimating a case fill of about 40-45% - right on the edge of the danger zone for flash ignition. After talking to quite a few reloaders, we decided to use Cream of Wheat to fill the empty space in the cartridge and hold the powder firmly against the rear of the casing. Cream of Wheat reportedly doesn't really add or subtract from the burn rate of the powder, and mostly makes its way out of the barrel when fired.
With the powder chosen we pressed onwards, machining a few of the casings using a lollipop end mill to get the undercut inside, and a slitting saw to part them off.
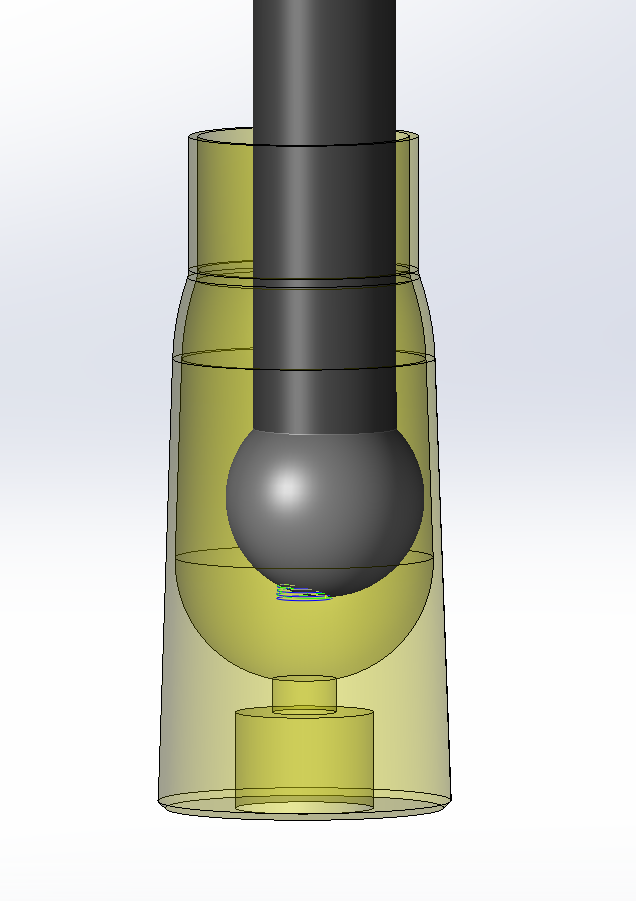
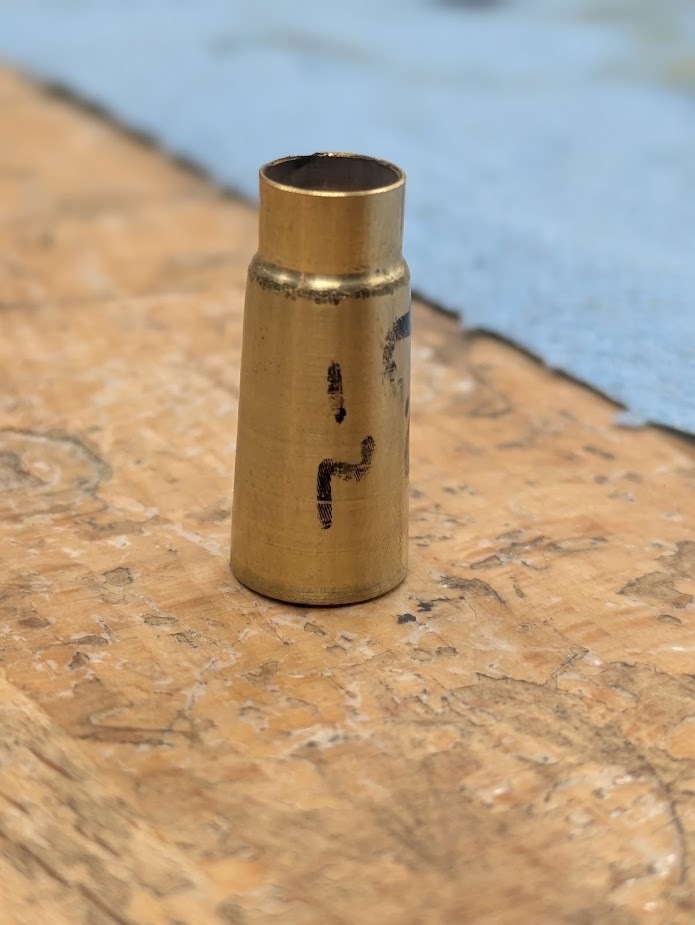
There is a nicely defined contact line around the shoulder in the picture above, with no contact anywhere else. This is how a typical bottleneck cartridge works, only the shoulder touches and everything else has a little bit of wiggle room, usually about 0.002"-0.004" radially.
The wikipedia article on this round very incorrectly states that the cartridge headspaces on the conical case body. This is, in fact, not possible. A tapered cylinder with an angle of less than 7 degrees per side (this one is 2 degrees) is subject to a phenomenon called taper locking. This phenomenon results in a high amount of force required to extract the male tapered part - the opposite of what you want in a pistol cartridge. Ever seen a brass casing get stuck in a reloading die?
So to avoid this problem, a typical bottleneck cartridge rests along a thin line of shoulder contact between the casing and chamber, which is what we did here.
Pressing forward, it was time to tackle the bullets. A strange discovery we made while mapping the chamber was that the bullet diameter changed quite substantially. The old original cartridge has a bullet of 6.5mm / 0.256". The grooves of the rifling in this pistol come in at 0.267", a difference of 0.011"! Firing the larger projectile in the tight barrel, if it would even chamber, would almost certainly cause a burst casing. Firing the small projectile through the large barrel would have severe accuracy issues at best, and most likely would leak enough gas to not cycle the action.
Typically for an old cast bullet cartridge, the maximum bullet diameter is specified as about 0.001" under the groove diameter to limit pressure spikes. Of course, a 0.266" 80-grain cast bullet was not something we could find anywhere. Thankfully Lee Reloading sells blank bullet molds, which saved a little bit of guess work in the arduous process of machining custom bullet molds.
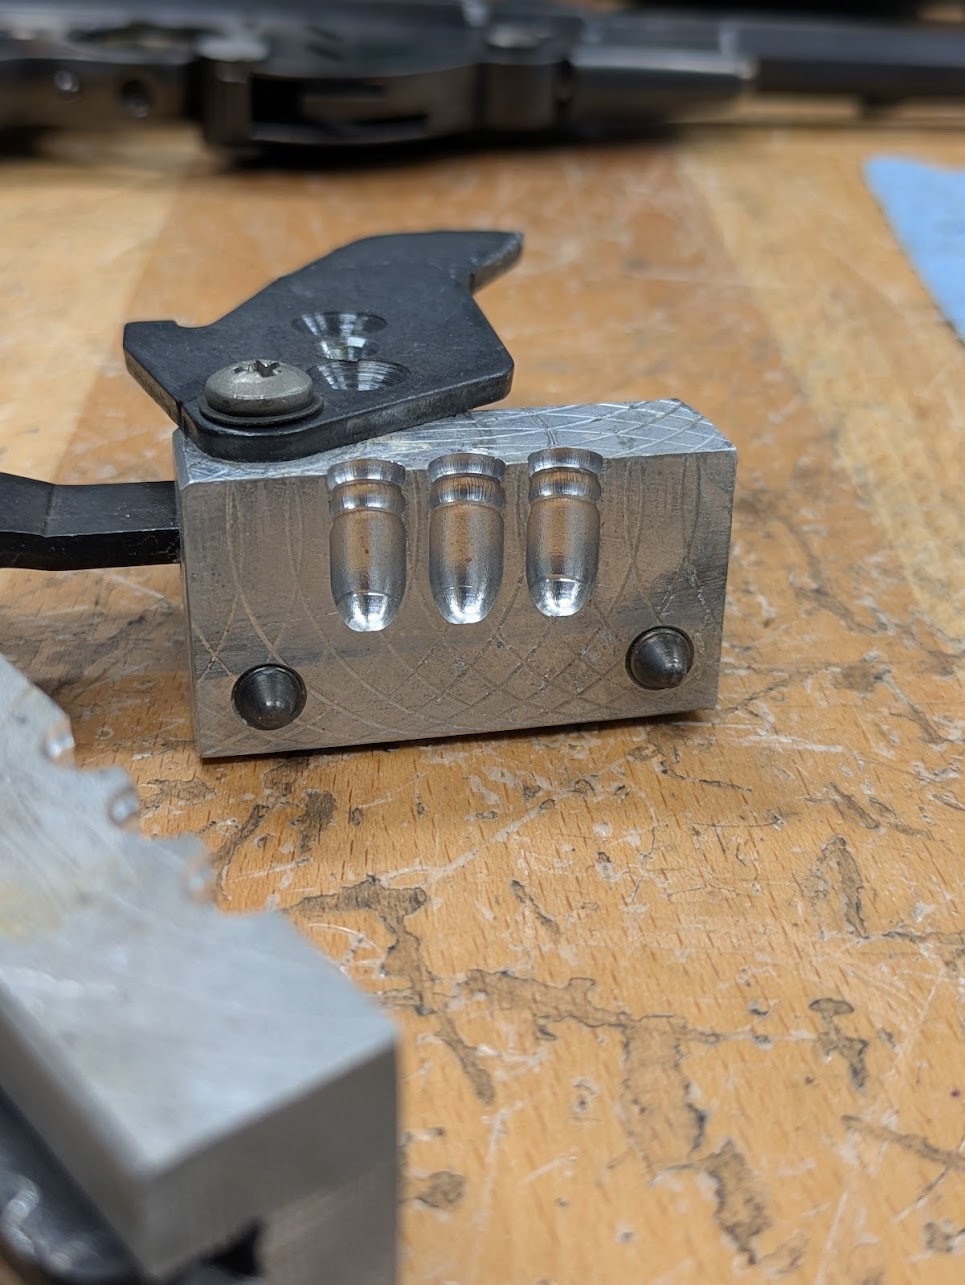
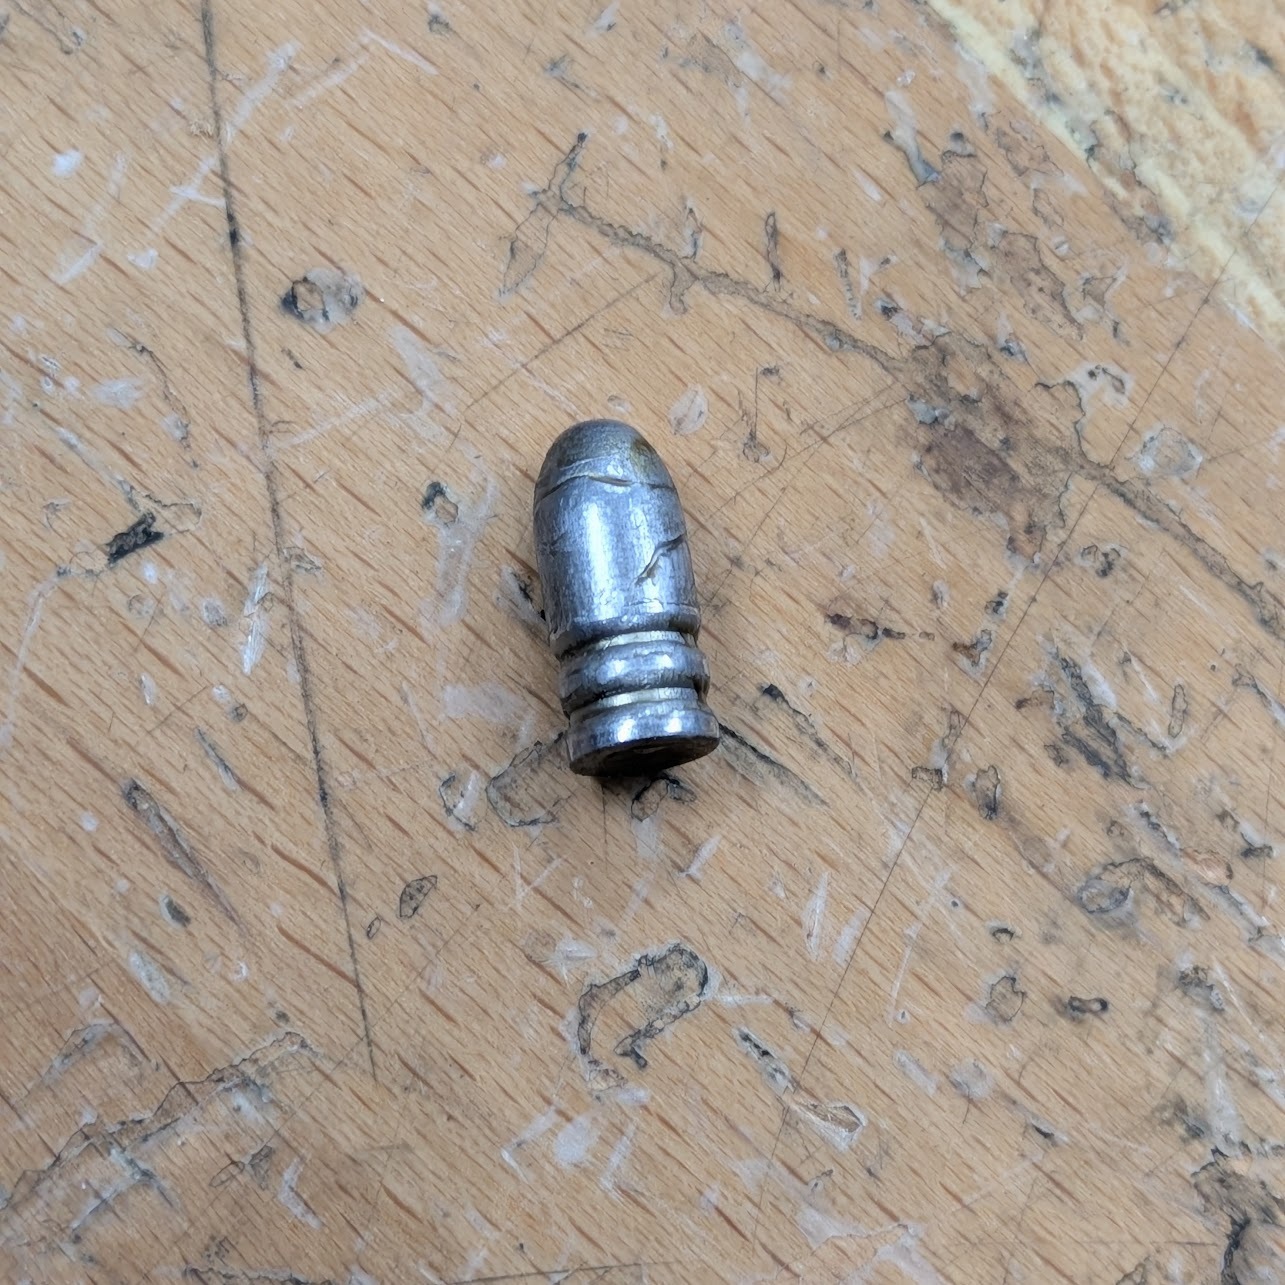
My bullet casting skills could clearly use some work, but it’ll do.
After all that, here’s our cartridge:
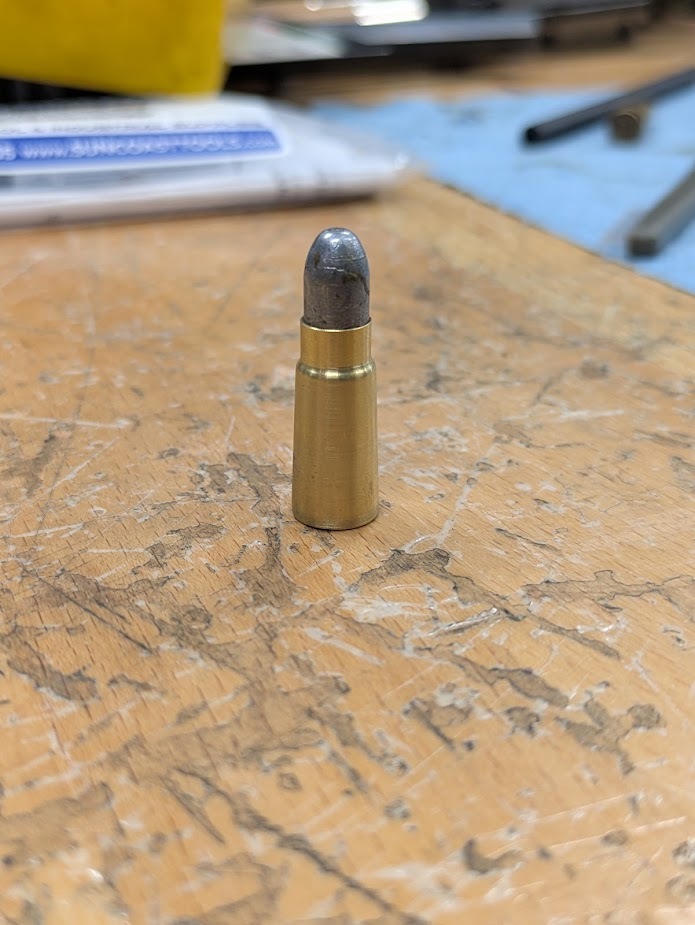
One of the first things you may notice is the lack of an extractor groove. As far as I understand, the first patterns of Bergmann pistols lacked an extractor entirely. These guns run on a direct blowback, unlocked breech system. An interesting quirk of direct blowback is that you don't actually need an extractor. The casing is generally pretty firmly pushed against the bolt face (it is the thing pushing it open, after all) and finds its way out of the gun just fine. There is a downside however - unloading. Removing a cartridge from the chamber of an extractor-less firearm is a frustrating task, and one experiencing it immediately understands why extractors were added on later models.
Which brings us to a quirk of this particular example of gun - it is a later model. So why doesn't our new reverse-engineered cartridge have an extractor groove? Several reasons:
- While the bolt does have an extractor, the claw is snapped off.
- I don't feel like making an extractor and dealing with dialing it in, including designing the hook shape and case rim shape from scratch (something I've never done)
- It doesn't need it
- The cartridge looks interesting and eye catching without the groove
After all that work, we finally shot it.
The results were sub-optimal.
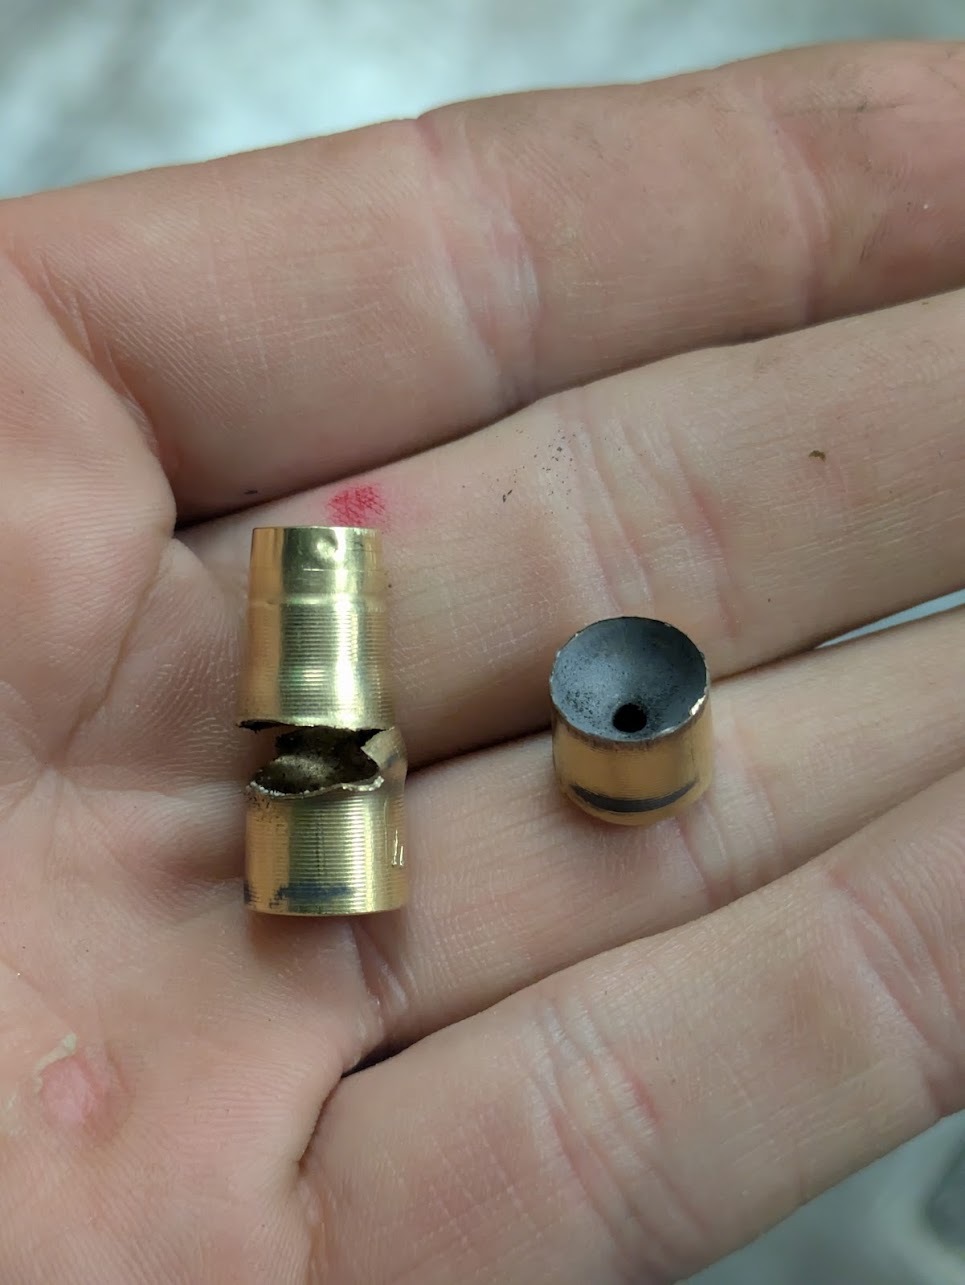
The first round fired, and ejected (so I thought). The chronograph gave a reading of 740 FPS, very close to the target of 750! So I chambered another round, not knowing that the first one had actually split the casing in half and left the front half in the chamber. I then immediately discovered the hard way that the Bergmann 1896 No. 3 does not have an out-of-battery safety of any kind. The new cartridge was sitting on the remnants of the old one in the chamber, and fired out of battery, rupturing it.
It turns out the casing that I saw eject downrange and out of reach was only the front half.
In my defense, the indoor range is quite dark. But even then, more precautionary action like tapping the bolt shut wouldn’t have prevented the out of battery discharge.
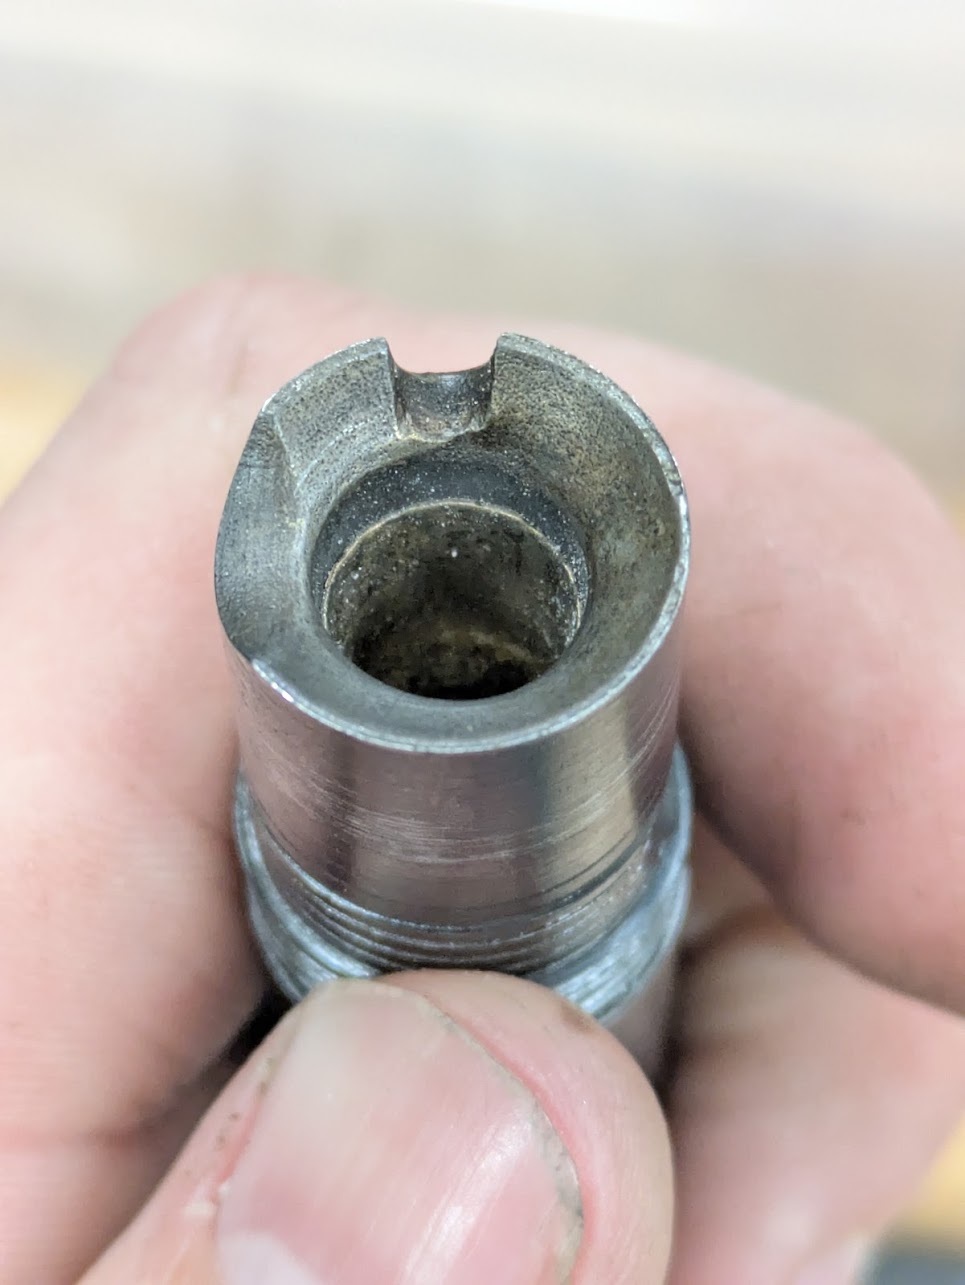
Luckily, the gun and my hand were entirely unharmed.
After this humiliating defeat, I decided that we really were obligated to cut open the original cartridge. I initially didn't want to deface a rare and collectible cartridge, but at this point it was either cut the ammo or risk hurting the gun again.
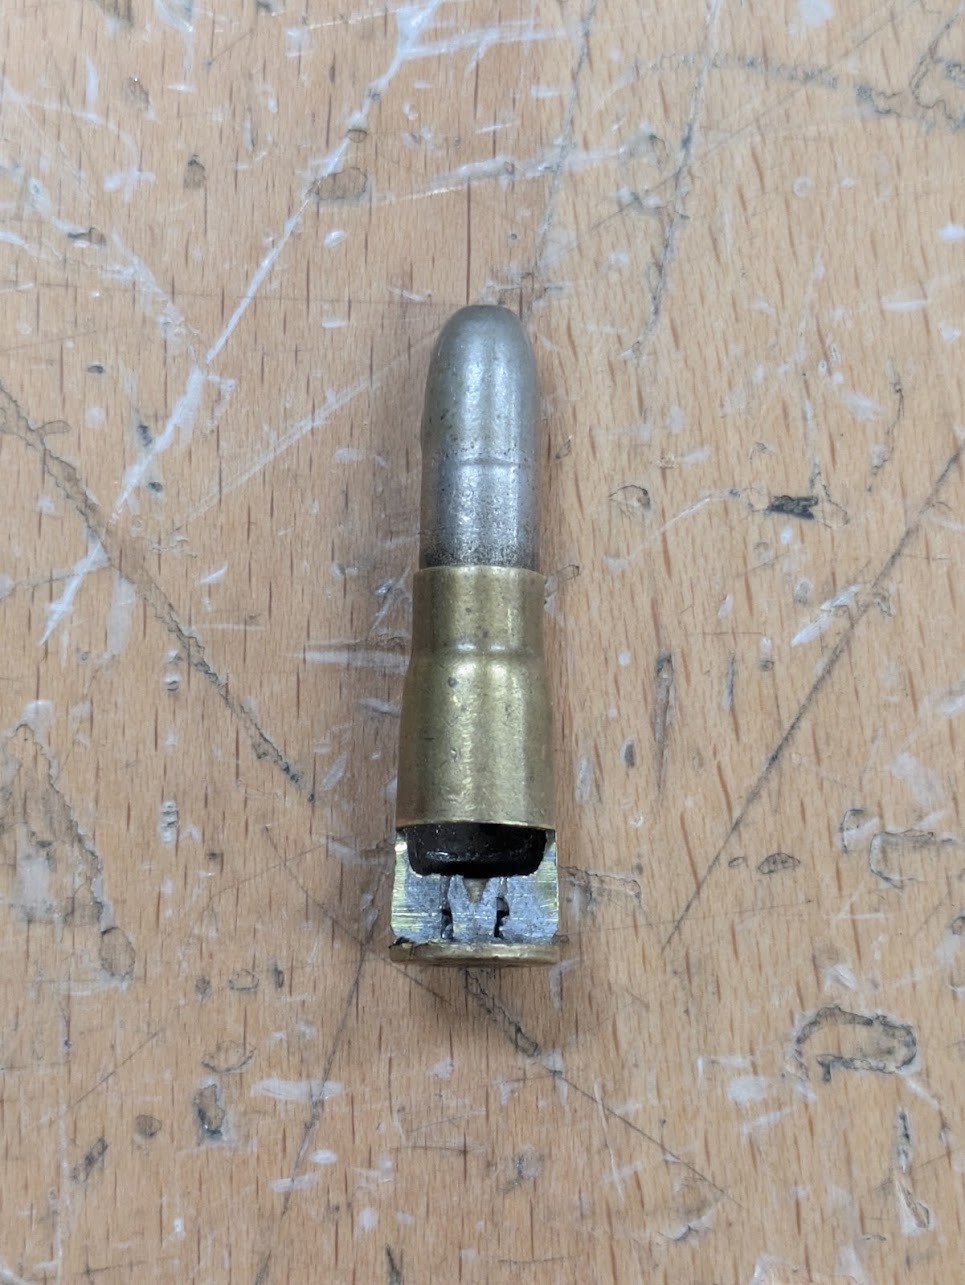
Don't mind the long proportion, I couldn't be bothered to push the bullet all the way back in before taking the picture.
Cutting open the ammo confirmed my suspicion - the gunpowder cavity was a good bit further away from the case head than mine, and the case walls were roughly twice as thick.
From here, I thickened the case in the 3d model and ran the GRT simulations again. The thicker case walls meant less internal volume, which ultimately meant the target powder charge was now 1.6gr (0.1gr lower).
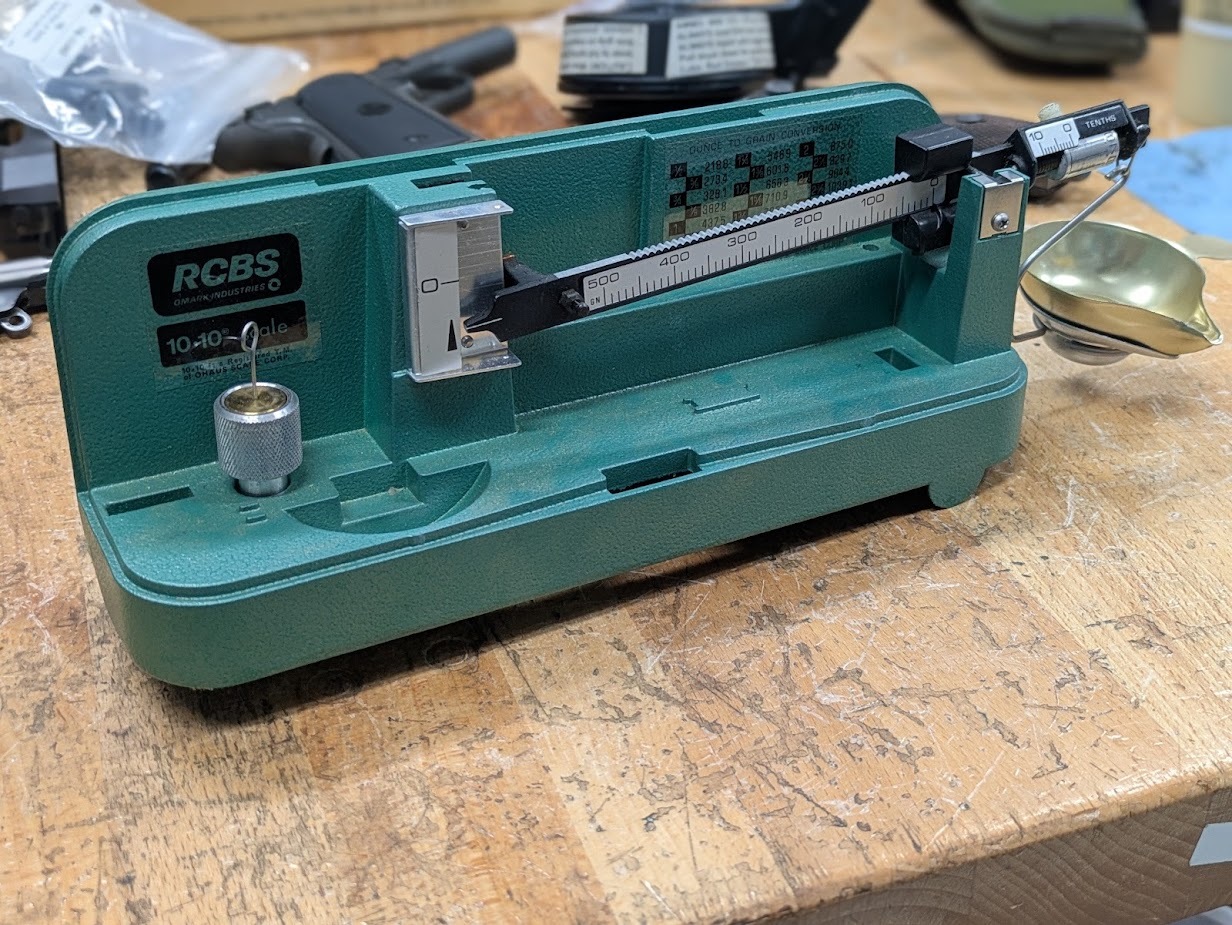
At this point, we got sick of fighting our Chinese electronic scale and bought a RCBS balance beam scale, model 10-10. This thing is so sensitive that a single granule of powder can be seen on the readings.
After machining the new thicker casings, we loaded 5 rounds with 1.6 grains of powder each. The results were not good - a minimum of 710 FPS, maximum of 810. Some cycled, most didn't. The good news is none of the casings split and all of them extracted.
However, a new problem arose: the 4 hottest rounds also had the primers fall out.
After much debate, we finally narrowed the list of possible causes down to the Cream of Wheat case filler. It turns out the bulk density of N32C in GRT is not quite right - the powder takes up a good bit more space in real life than in the simulation. So, by adding filler, we were actually compressing the powder charge! This is a rookie mistake. Compressed smokeless gunpowder does not burn consistently and causes pressure spikes, which explains our FPS variation and dropped primers (which are a classic sign of excessive or incorrectly timed pressure). The simulation estimated case fill at about 45%, in reality it's closer to 70%.
Looking again at the sectioned original casing, we noted that it was made with a Berdan primer, an older style system. This Berdan primed casing used two smaller primer flash holes on either side, instead of the more common Boxer arrangement of one large hole in the middle. Suspecting that maybe the larger cross-sectional area of our 0.078” flash hole was contributing to the dropped primers, we worked out that a hole of 0.050” diameter would have the same cross sectional area as the pair of holes in Berdan style. All casings from this point forward have a smaller flash hole. If I were to do this again, I would focus more on ensuring we change only one variable at a time to better understand which factors had the largest effect on solving problems. It’s easy to make mistakes like this when a project is spread out over months, as well as being one of many other complicated projects. Oh well, next time.
After removing the Cream of Wheat and reducing the flash hole size, we loaded a few more rounds at 1.6 grains of powder. And it worked perfectly! Just kidding, another problem came up.
This time, the gun was slam firing. As the bolt closed on a fresh round, the heavy free-floating firing pin slammed forward with enough energy to set off the primer. At least the muzzle velocity was good!
As for why this was not a problem until this point, I have no idea.
Here’s some footage of a slam fire after we thought we had fixed it.
This pistol has a shockingly strong recoil spring, which means the bolt goes home pretty quickly. According to some napkin math, it gives the firing pin an average energy of just a hair under the spec required to set off small pistol primers. Wonderful.
The original ammo used a Berdan primer, which are infamous for being quite hard and difficult to ignite. This aligns with the hammer spring on the gun also being surprisingly strong compared to any other handgun I’ve seen. Unfortunately, in typical fashion, Berdan primers are not something you can just buy these days.
Since we can’t get the original style primers to resist the firing pin inertia, we need to slow down the firing pin somehow.
The gun is not set up in such a way that allows retrofitting a firing pin spring. The recoil spring pushes against the front of the bolt stop block, and any attempt at a firing pin spring pushes against the rear, which drives the bolt open and out of battery.
We wound up coming up with a crude but effective solution: a piece of rubber with an aluminum shoulder to press against. After some extensive testing, this proved to fix the slam fire issue
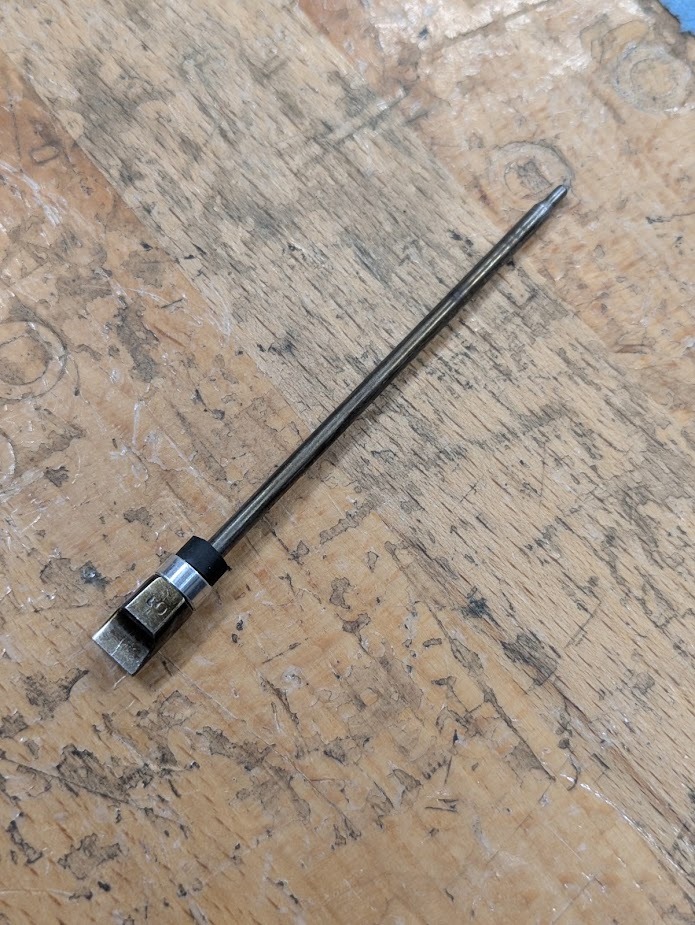
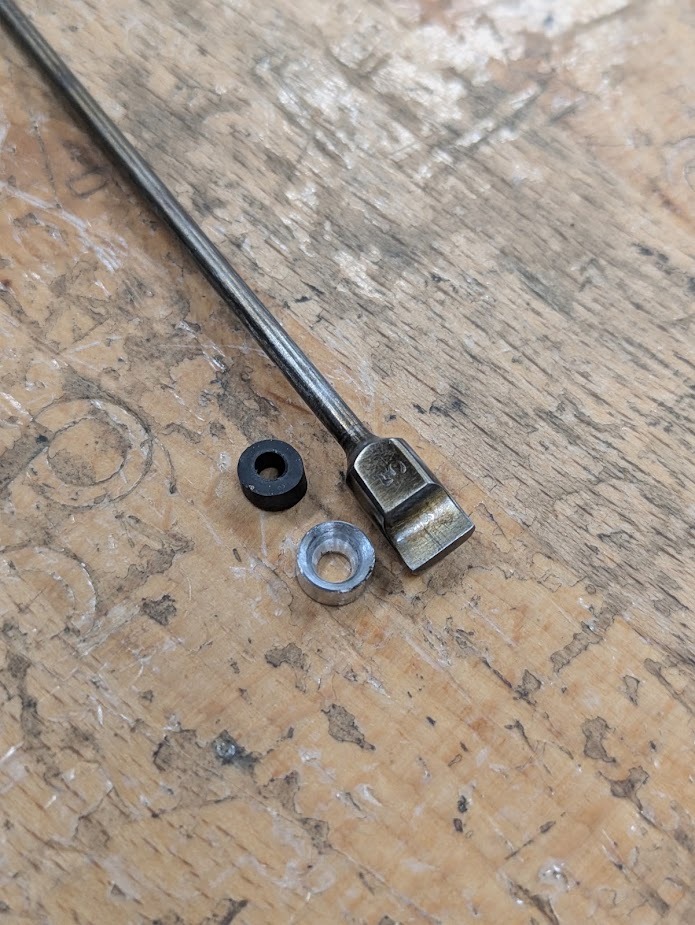
As further insurance against slam fires, we decided to experiment with primer seating depth. Initially, we were machining the primer pockets in such a way to allow the primer to sit about 0.005” below the case head. After measuring an assortment of Berdan primed cartridges in the shop, we found they averaged about 0.015” below flush. When deciding how deep we could get away with setting our primers, we discovered the firing pin protrusion on this gun was ~0.090” - nearly as far as the entire bolt face depth, giving the system plenty of wiggle room for deeper primers.
Ultimately we decided to stick with 0.015” as our nominal spec, but casings with primers set as deep as 0.035” still ignited reliably in our testing.
Another area of experimentation was neck tension. Initially I set the neck tension, or how tight the bullet in the casing is, to 0.001”. Upon dry cycling the gun and seeing the bullets set back into the casing by the feed ramp, we elected to add a form of neck crimping.
Initially, I did this with a 5-C collet chuck on my lathe, working the same way as any other neck crimper by deforming the neck of the casing all the way around the circumference, holding the bullet firmly in place. When we were chasing the aforementioned primer dropping problem, we elected to remove the crimp and only fire one round at a time to eliminate variables. The thought was that the crimp was possibly making the pressure-time curve happen at an inopportune moment, letting the gases make the gun work as primer actuated blowback instead of direct blowback.
In a not-so-scientific way, we forgot about the neck crimping entirely for a while and do not have any data about if it was contributing to dropped primers. I suspect it probably was affecting the pressure-time curve negatively a little bit, but the Cream of Wheat compressed loads were probably the majority of the cause.
At this point, we were reminded that many of the original casings have a 3-dot crimp (also commonly seen on 7.62x25 Tokarev) which would hold the bullet in place but not quite as hard as the previous method.
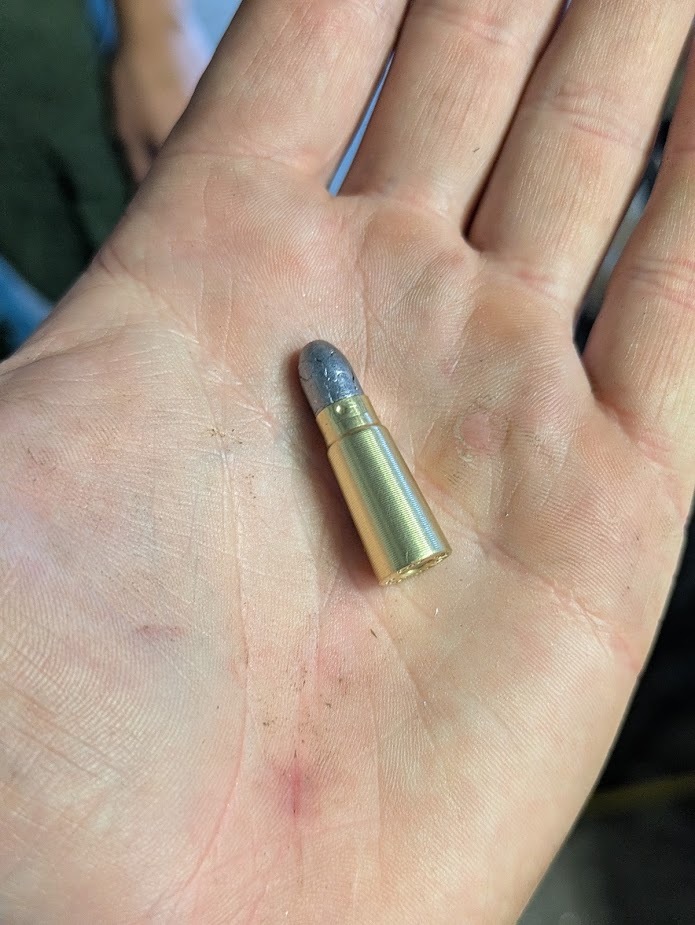
We made a little 3d printed jig using a ¼” center punch and a hammer to stake, and a AR-15 selector detent and spring to index it for the next position.
Finally, after all this, we loaded 8 rounds - all of the casings I had left at the time.
And they mostly worked!
One of them short-stroked, and our FPS readings varied from 720 to 780. Much better than before, but still not perfect. According to GRT, a variation of 0.1gr results in a velocity difference of 25 FPS; quite a finicky cartridge and powder combination. Additionally, the flakes of the powder are not a consistent size (seen in the picture earlier) which also has a negative effect on consistency.
In other words, I don't think it's going to get much better than this without developing a new type of gunpowder, or maybe finding a way to simulate Trail Boss. After all, the goal here was to get this gun to run a dozen rounds or less for a video, and be the first footage anywhere on the internet of an 1896 Bergmann firing.
When doing our final test fire before handing it off to Brandon for his video, we fired 5 rounds with the 3-dot crimp and 5 without. There was no observable velocity difference. Additionally, the 3-dot crimped rounds did not seem to experience any setback from feeding or recoil when in the magazine, although admittedly I didn’t remember to check for that beyond a glance.
Ultimately we fired 11 more rounds throughout the filming of Brandon’s video. One of them short stroked, and one was a misfeed from a crude attempt at a reproduction en-bloc clip - but it fired and functioned when chambered manually. 10 out of 11 is not bad at all, all things considered.
The process you see in this article is a summary of about 2 months of on-and-off work. My prior experience with reloading amounts to about 25 rounds of 5.56 and maybe 10 rounds of black powder .303 British.
This is one of the most difficult and eye-opening projects I've ever undertaken, and it wouldn't have happened without all of the Brass Valley crew. Special thanks to Nik for putting up with me, Erich for all of the ammo engineering advice, and Brandon for giving me a job doing this insane stuff!