KP9 Firing Pins
Posted by Chefur on Mar 20th 2026
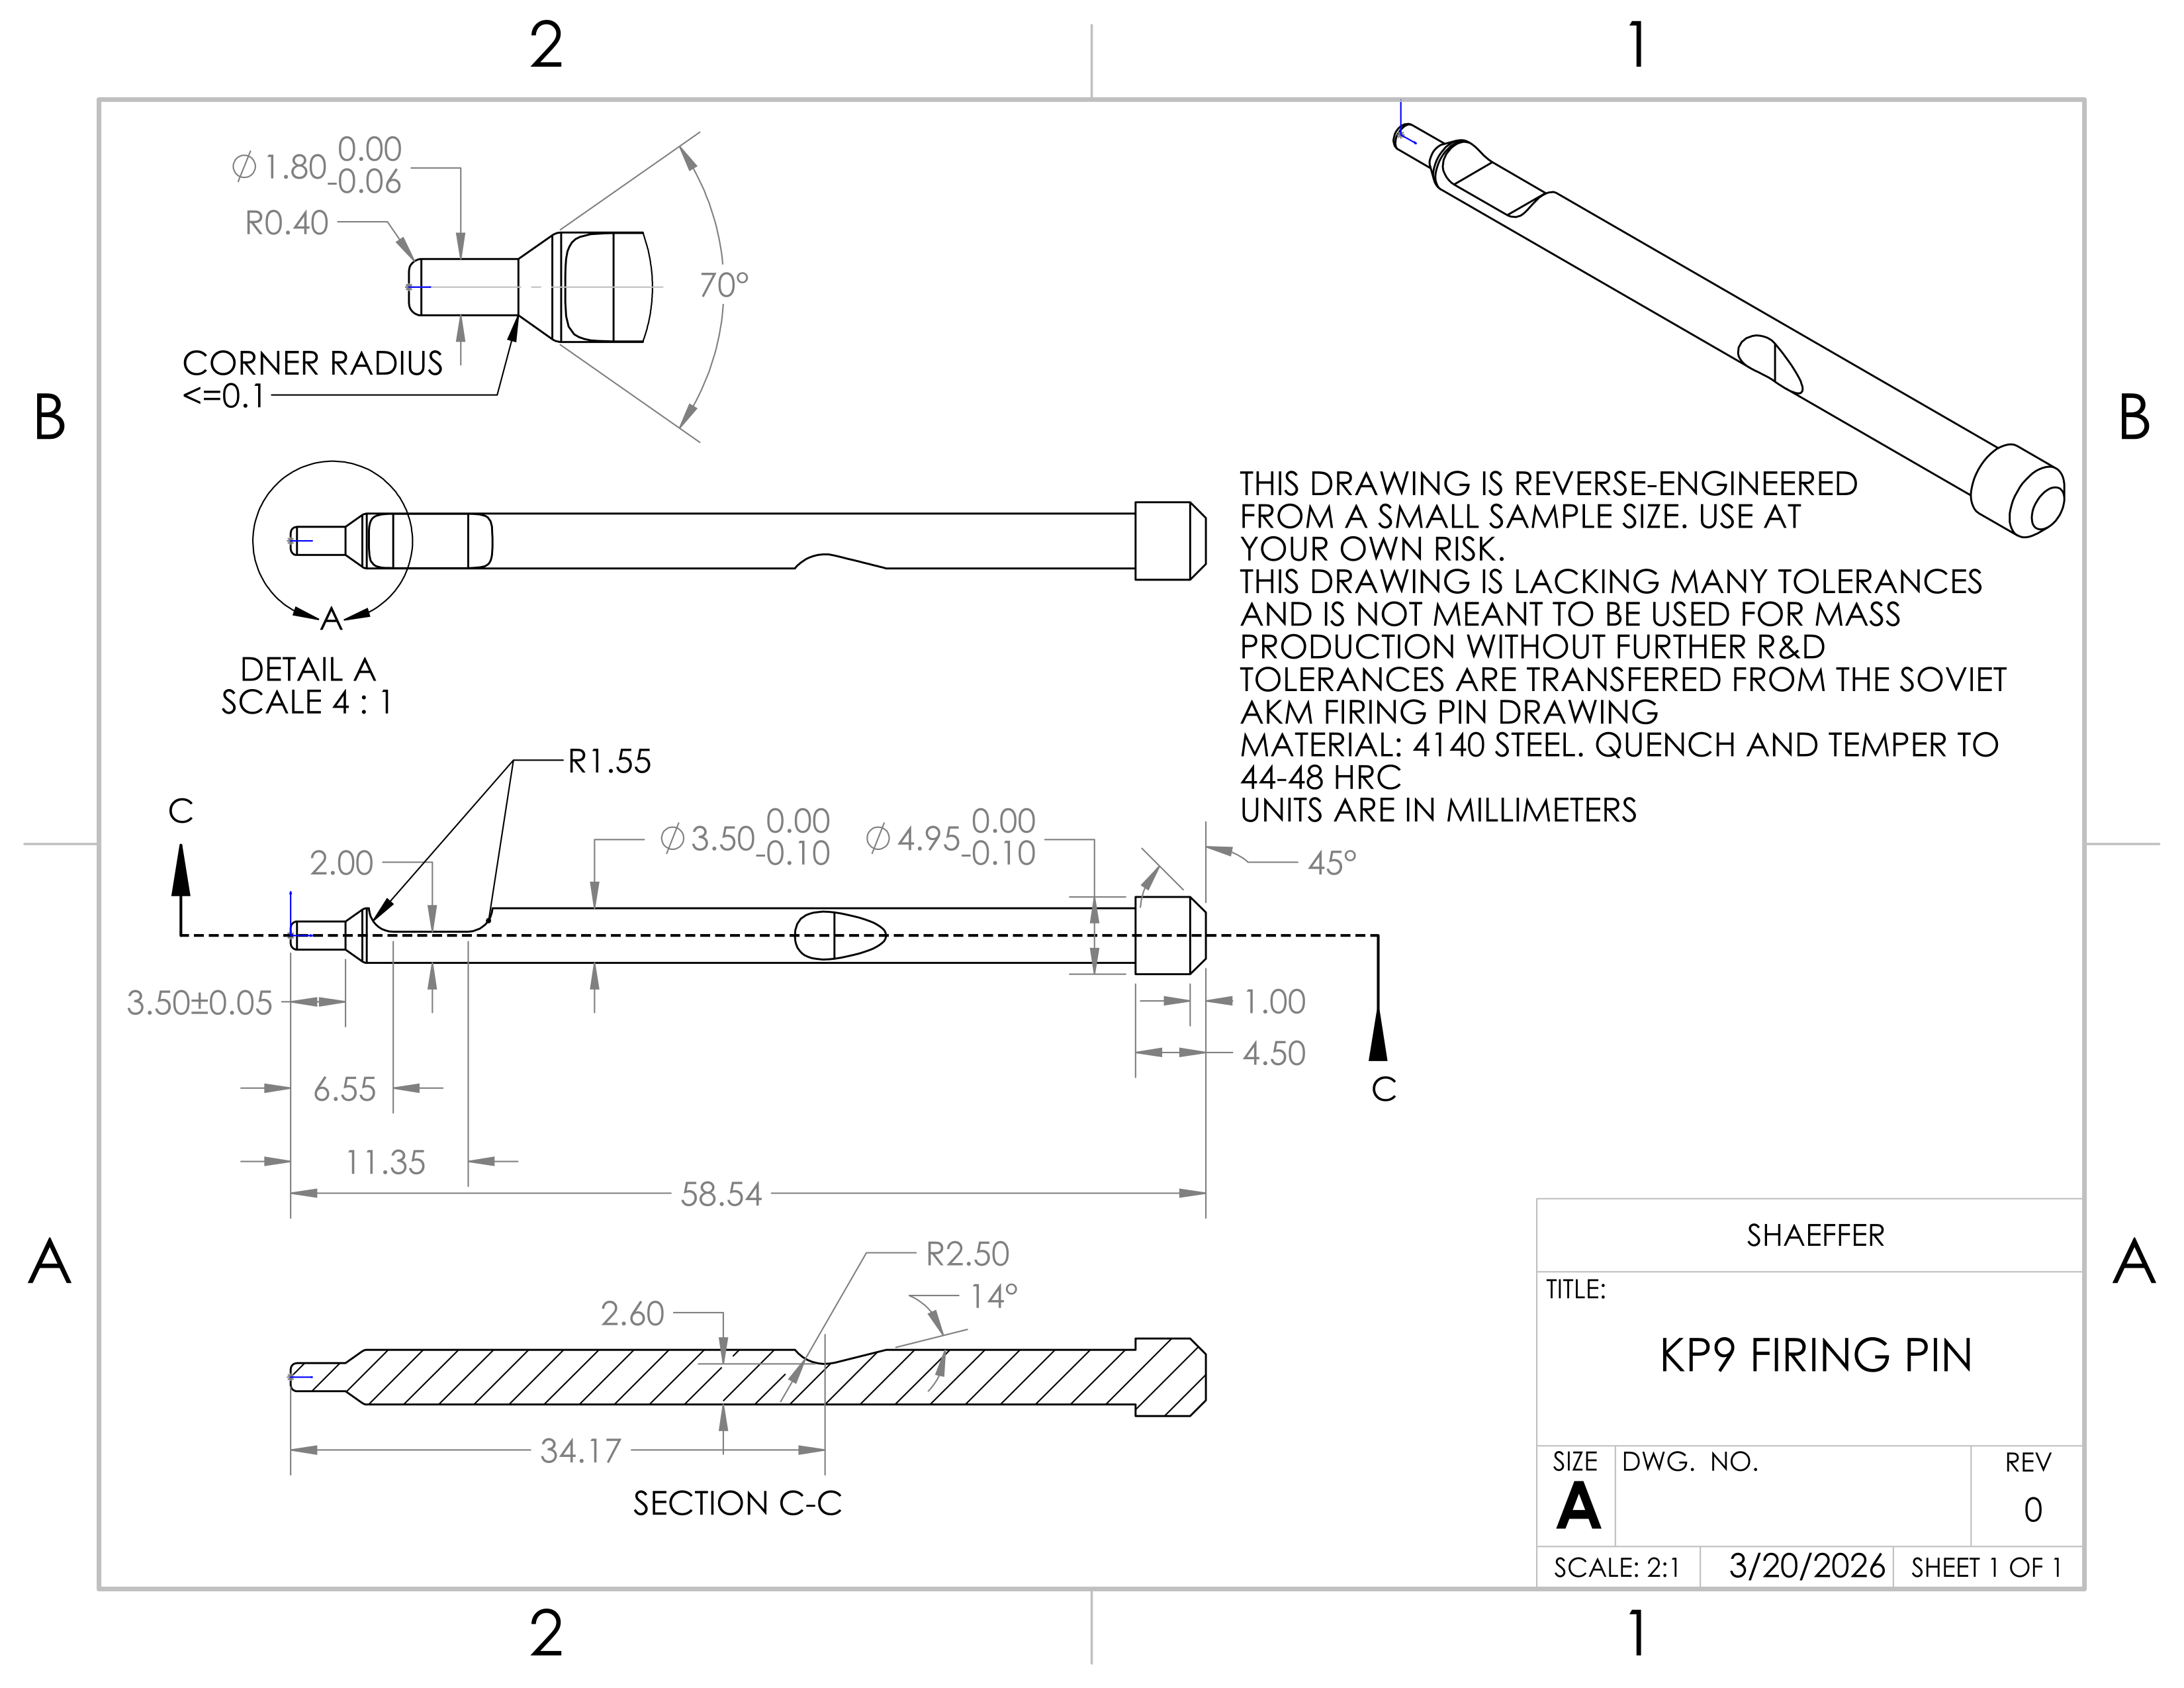
Lately, I've been asked several times to put KP9 firing pins into production. I have no desire to do so, especially with the horrendous QC of the KP9 bolts and the amount of inspection that is required to ensure the out of battery safety is functional.
However, I spent a while today making a drawing from a small sample size of the KUSA "Upgraded" firing pins.
Please note. This drawing and the below specs are reverse engineered and are likely imperfect. The exact numbers given may vary from reality, and all should be gone over by a competent gunsmith with hands-on your exact gun.
You are free to use this drawing as you wish, but know that you will need to check a few things when installing it:
1) The out of battery safety plunger must be functional. With the fully assembled bolt out of the gun, press the firing pin from the rear with a punch. It should not protrude into the cartridge pocket at all. Note how deep the pin goes before it stops.
Then, install the bolt into the gun. Hold it forwards, and press the firing pin forward again. It should stick deeper into the bolt, protruding into the cartridge pocket.
Now, put a 0.030" feeler gauge between the bolt and barrel face (you may have to stack up feelers to hit this number, depending on your set). Hold the bolt forward against the gauge and press the firing pin with a punch again. It should not be able to go as deep as the prior step. If it does, your OOB plunger is timed incorrectly and will allow the gun to fire out of battery.
2) The exact specs for firing pin protrusion and retraction are not something I am able to accurately reverse engineer from such a small sample size and such variable bolt machining. I have drawn the firing pin to the best of my ability and it should be functional, but it's entirely possible to have a defective bolt that results in pierced primers.